SEND RFQ
When the engineer clicks on the Send RFQ button, the system automatically selects all unsourced parts. Additionally, if there are any other parts for which the engineer wants to obtain quotations, they can manually select those parts as well.
Checkbox Behavior:
- Unsourced parts are automatically selected and their checkboxes are disabled (cannot be deselected)
- Sourced parts remain unselected by default, but their checkboxes are enabled, allowing engineers to manually select them if quotations are needed
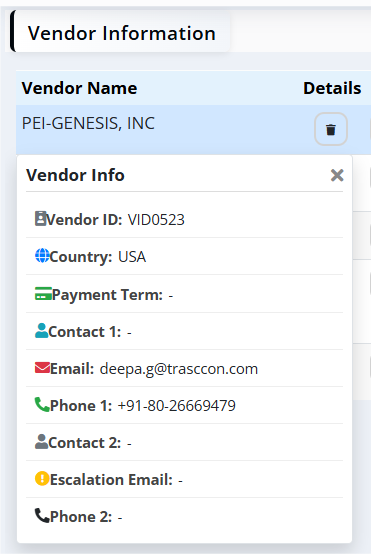
Click on the Fetch Supplier button to open the Vendor Information page, which lists all available suppliers.

Vendor Information
The Vendor Information page provides the following features:

-
Vendor Name: Displays a list of vendors (e.g., PEI-GENESIS, INC., ELIMEC ELECTROMECHANICAL ENGINEERING).
- When you hover over the vendor names the vendor details will be displayed.
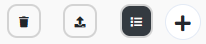
Actions
-
Delete: Remove a vendor from the list.
-
Upload: Upload vendor-specific data or quotation files.

- Clicking the upload icon opens the "Upload Files" modal.
- Click Choose Files to browse and select files from your computer.
- The selected filename will be displayed next to the button.
- Click Upload to confirm and upload the file, or Cancel to close the modal without uploading.
-
List: View details for the vendor.This is used to send the template to particular vendor
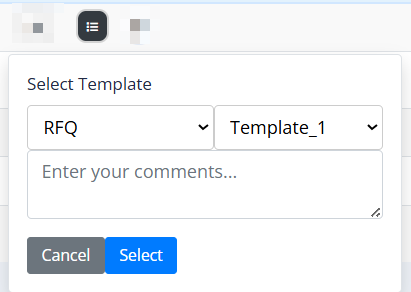
- Clicking the list icon opens the "Select Template" modal.
- Select Template Category: Choose a category from the first dropdown.
- Select Specific Template: The second dropdown will populate with templates belonging to the selected category. Choose the desired template.
- A comment box is provided for additional notes.
- Click Select to apply the template or Cancel to close the modal.
-
Plus: Expands the view to show all internal part numbers associated with the item.

- Move Part:
- Select the checkbox for the internal part number(s) you wish to move.
- Choose the target supplier from the Select Vendor dropdown.
- Click Move to add the selected part(s) to the chosen vendor.
- Delete: Remove the selected internal part from the list.
- Table Columns: The expanded view displays a table with the following columns
- Select: Checkbox to select parts.
- Internal Part No.: Internal identifier.
- MPN: Manufacturer Part Number.
- Description: Part description.
- Commodity: Part category.
- Manufacturer: Manufacturer name.
- UOM: Unit of Measure.
- Quantity: Required quantity.
- Info: Tooltip/icon for more details.
- Move Part:
Unidentified Parts: These are parts that do not have an associated vendor name or PO history. They are grouped together for user convenience. And even these parts we can send the RFQ

Add Supplier
Click this button to open the "Select Vendor" modal.
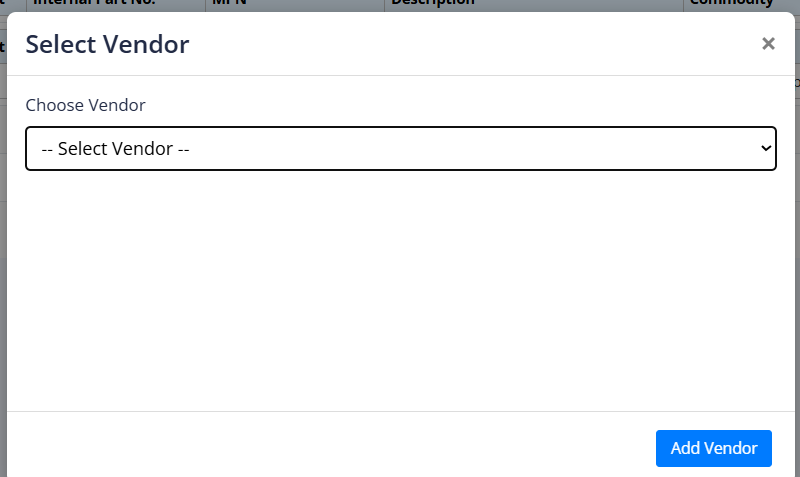
- Choose a vendor from the dropdown list.
- Click Add Vendor to add the selected supplier to the list.
Template
Click on the button to open the "Select Template Options" modal.
- This is used to select the template to send the same template to all the vendors.
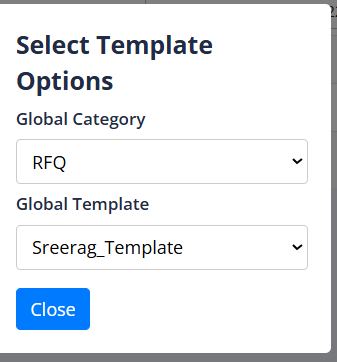
- Global Category: Select a category for the template.
- Global Template: Select a specific template related to the selected category.
Click Close to exit.
Send RFQ
Finalize and send the Request for Quotation.and a success message will be displayed.
- Home: Navigate back to the main dashboard or landing page.
- Back: Return to the previous screen.
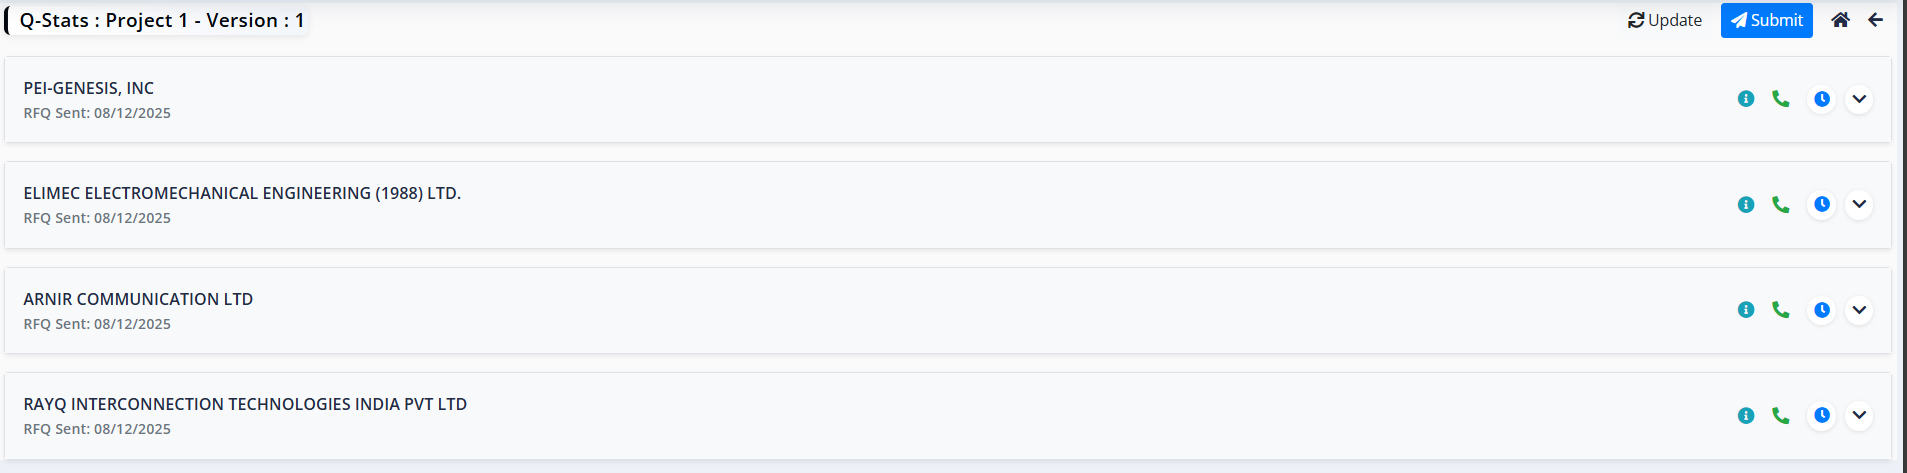
Once the RFQ is sent, the selected parts are automatically moved to the Q Sourcing Stat tab for tracking.
Note: Email notifications are sent to vendors using the template configured in the Template Section.
To view the quotation status, click the Q Sourcing Stat button located in the top right corner of the page.
Update Quote
Received quote information is updated back into the system.