UPLOAD STATUS
Once a project is assigned to your profile, you can manage its data uploads.
Accessing Upload Interface
Click on the plus icon (+) in the Upload Status column. A new tab will open with the upload interface.

User has a multiple ways of uploading a file
- Compare the files
- Get Released List
- AI scrubbing
1. Compare the Files
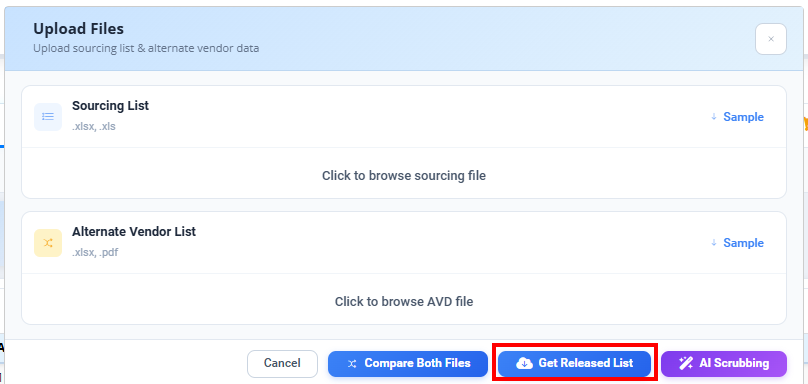
Step 1: Upload Files
User need to upload the required files:
- Sourcing List: Click on the click to browse sourcing file and u will be able to upload the required file.
- Alternate Vendor List: Upload your Alternate Vendor Data (AVD) file (optional).
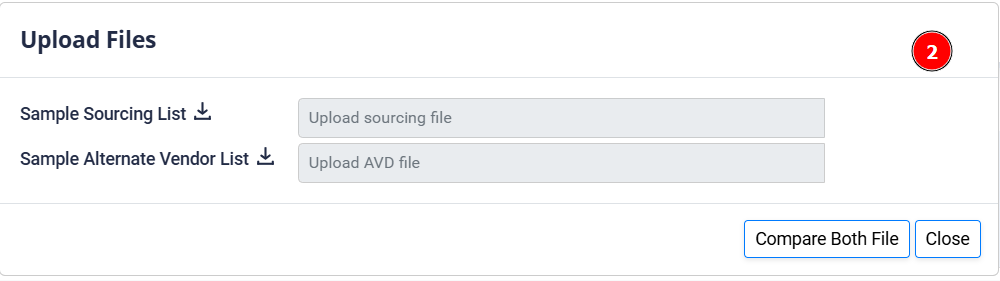
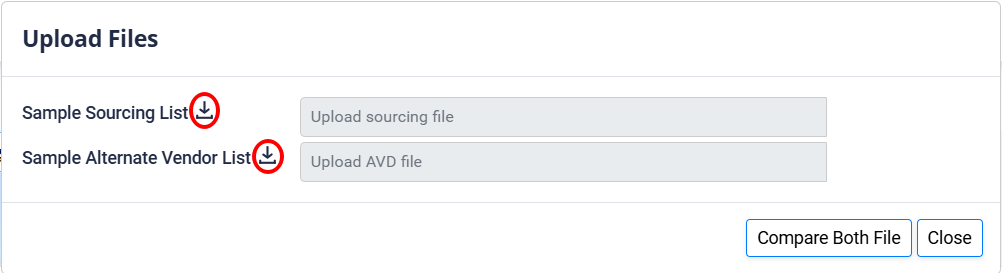
!!! Note The system accepts specific file formats. You can download a sample template if needed.
Step 2: File Validation & Mapping
After uploading, click Compare. The system will validate the file headers.
If the file headers do not match the expected format, an error will appear (e.g., "Missing headers: Project Quantity").
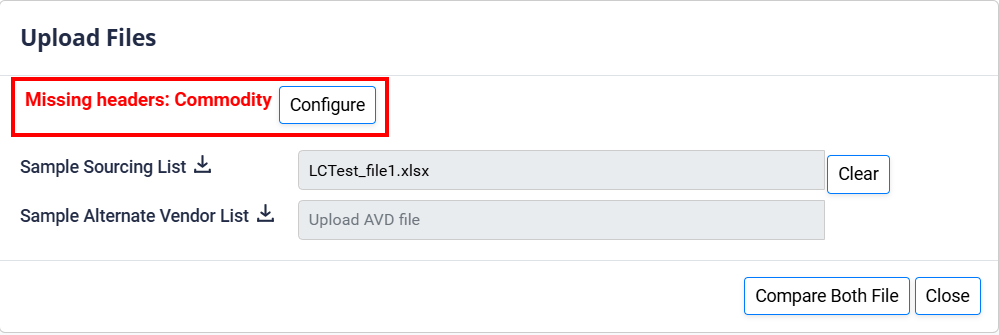
To fix this:
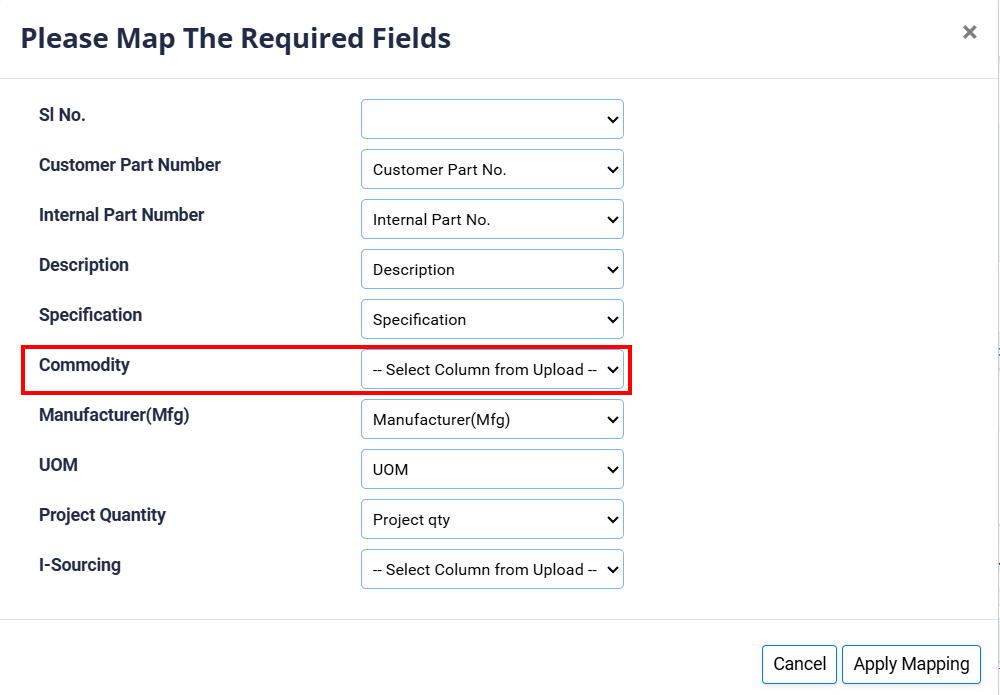
- Click on Configure.
- Select the correct header name from the dropdown list to map it to the system field.
- Click Apply Mapping.
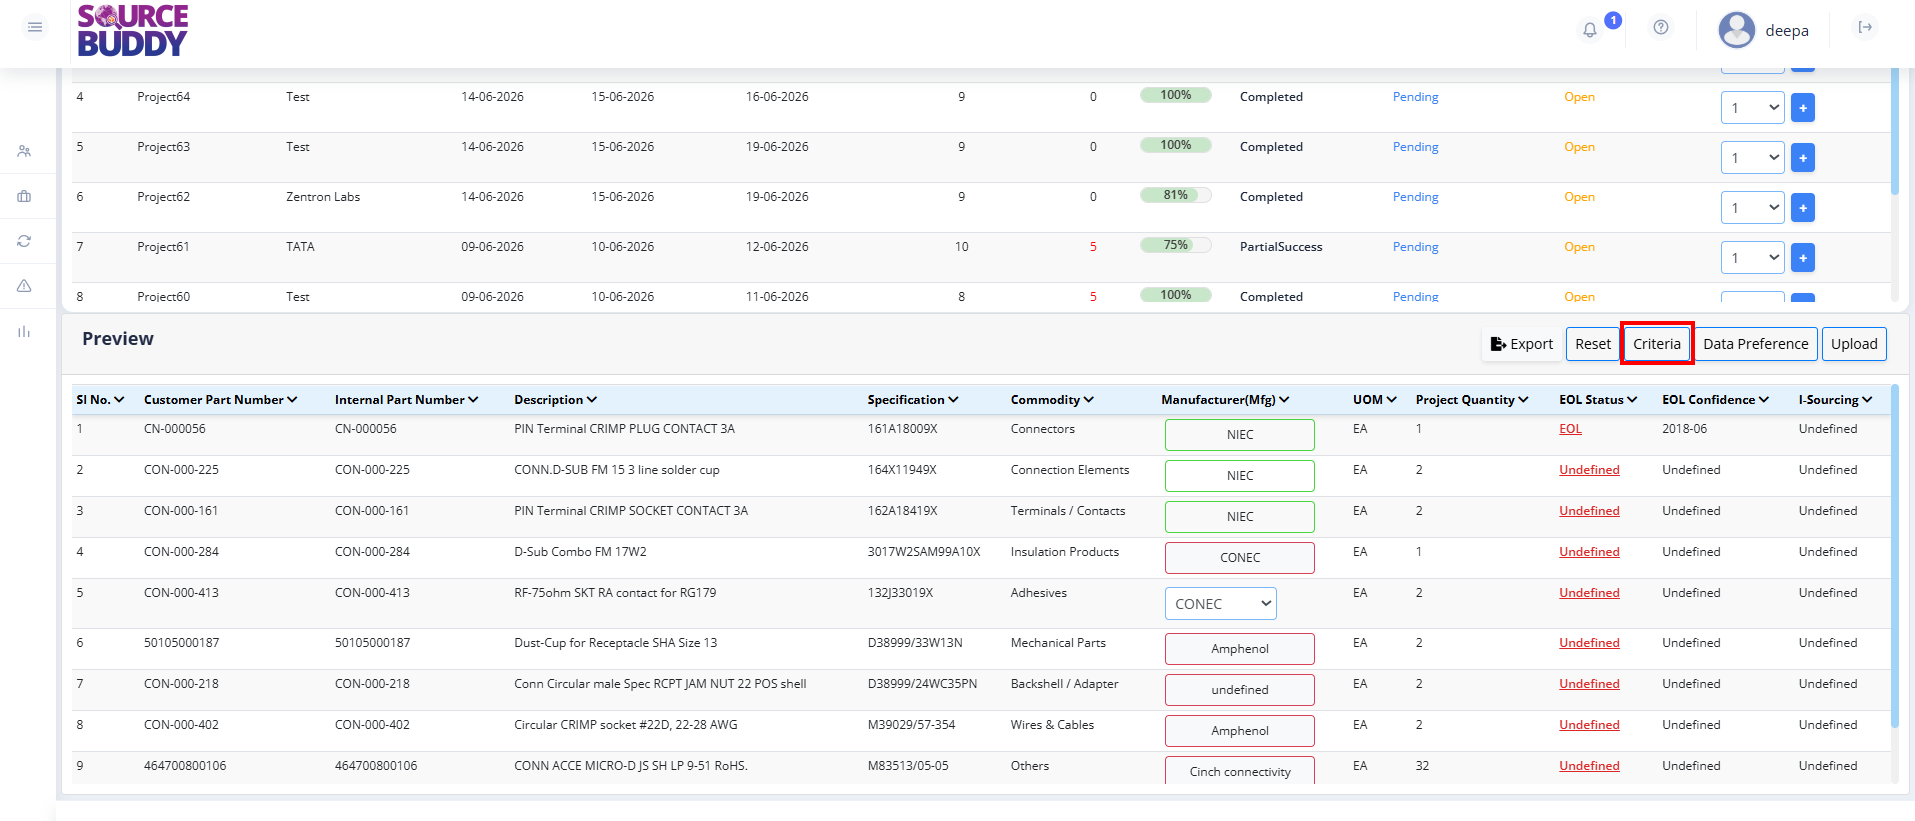
Step 3: Preview & Compare
Once the files are uploaded and mapped, click Compare. You can preview the data below.
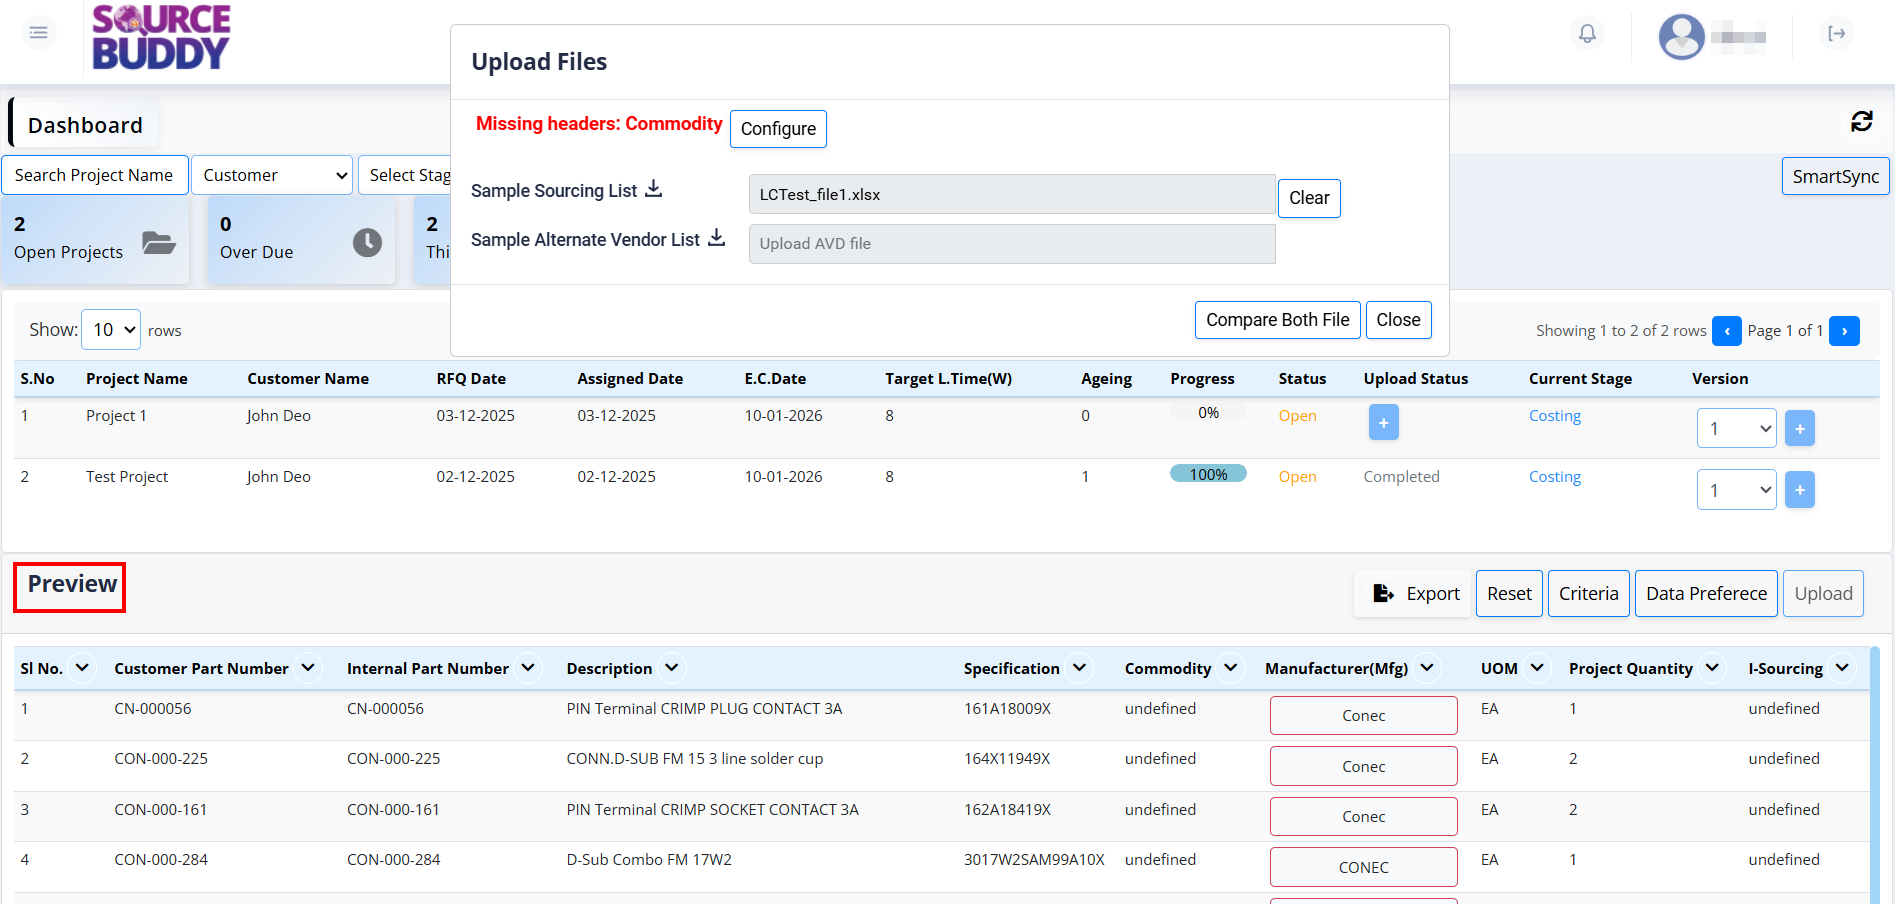
The comparison result will be displayed in a table format:
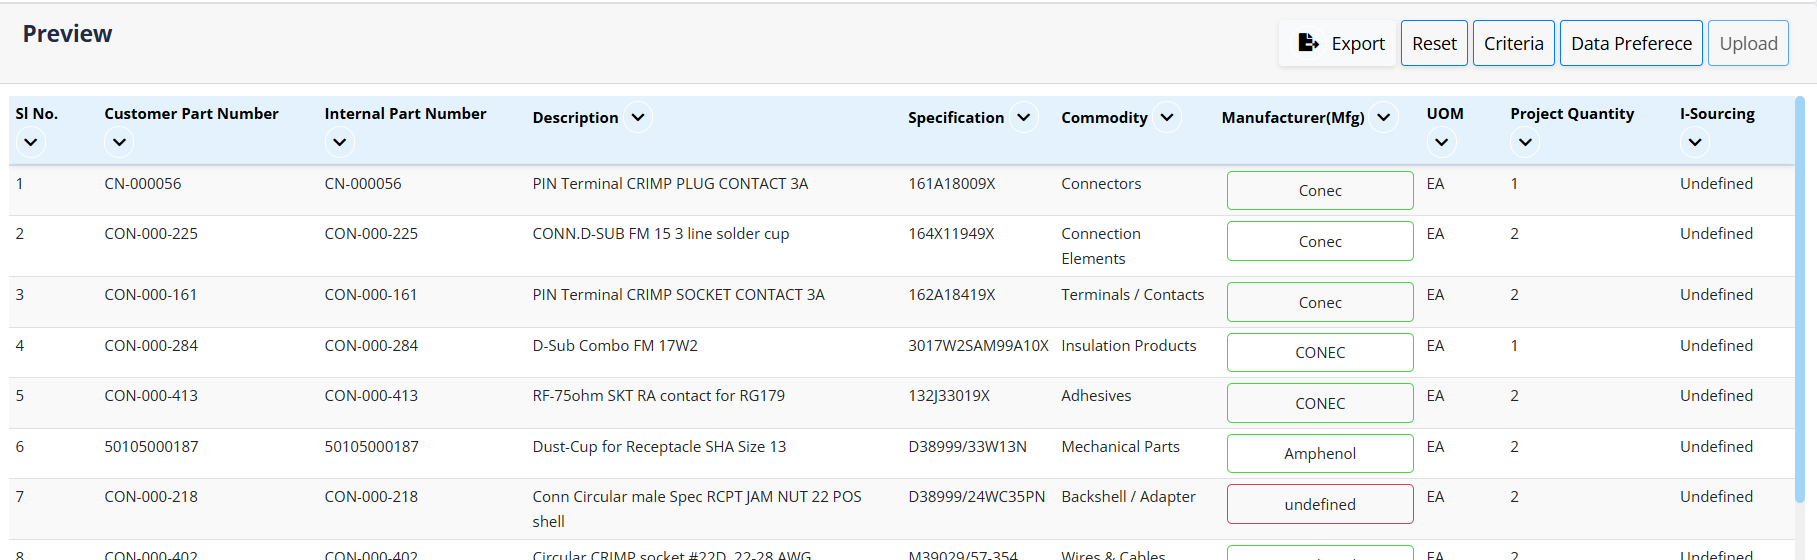
Step 4: Manufacturer Validation
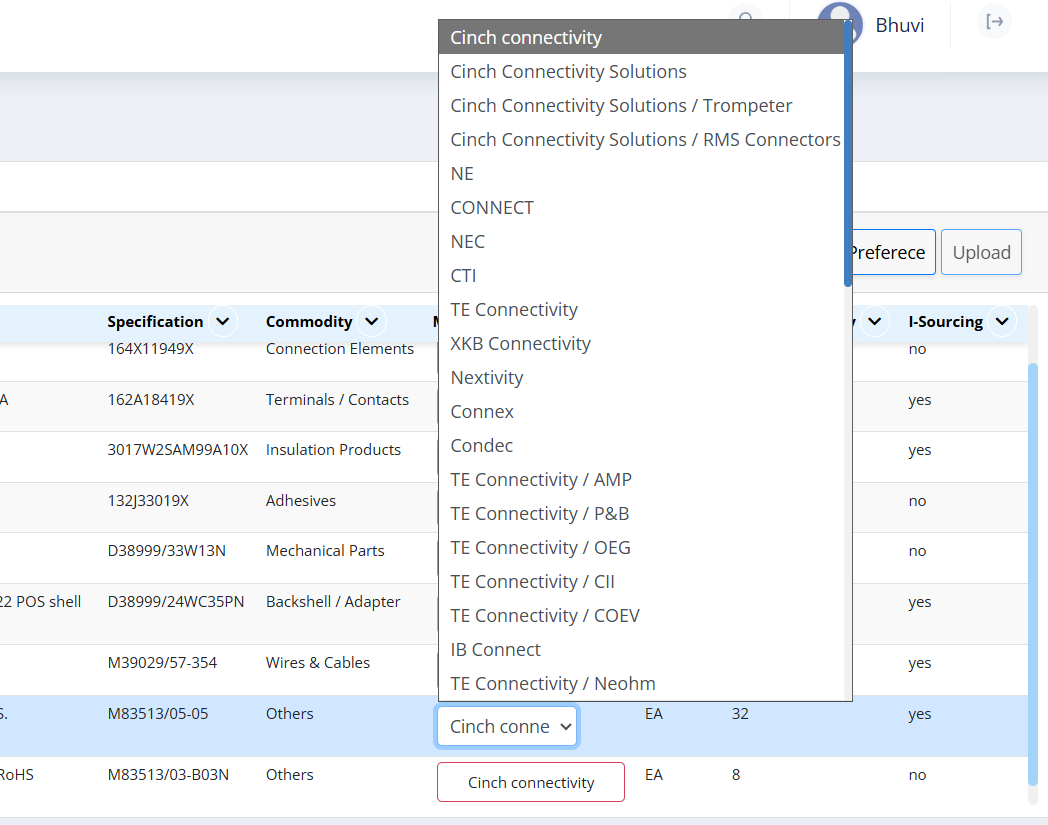
Review the Manufacturer column:
- Green: The manufacturer is recognized and valid.
- Red: The manufacturer is undefined or does not match system records.
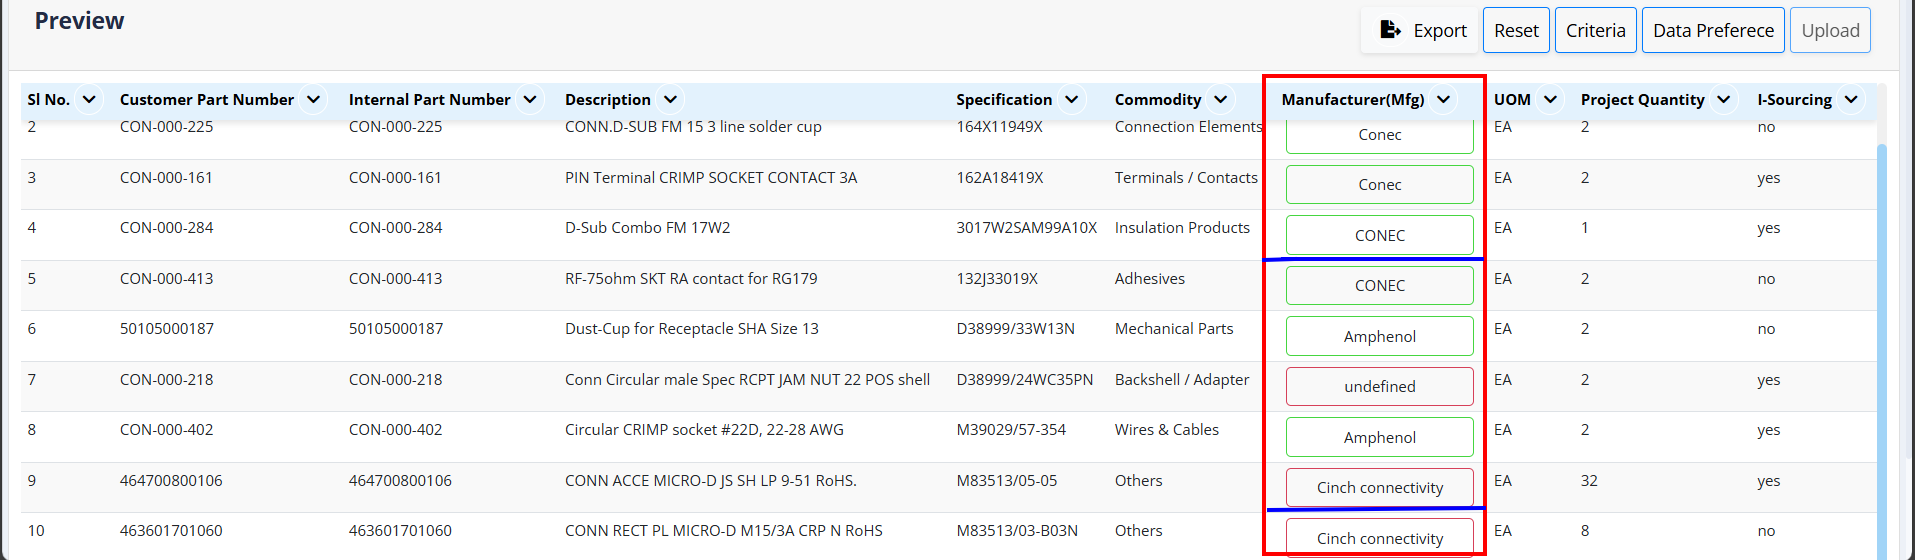
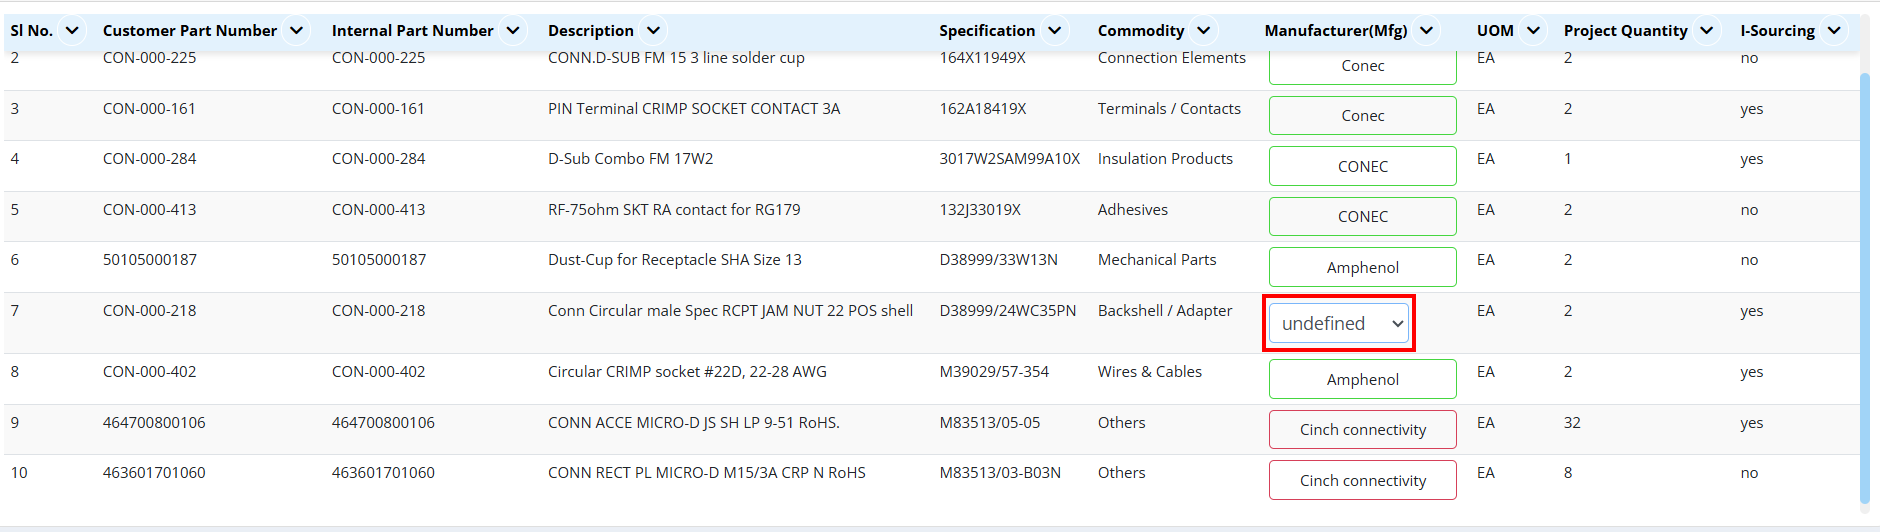
To fix red items:
- Click on the red manufacturer name.
- Select the correct manufacturer from the dropdown list.
- The entry will turn green.
Step 5: Select Criteria
- Click on Criteria and select the appropriate criteria for the project.
a tab will open with the heading Sourcing Criteria and sub-heading Configure ranking & filtering preferences

The available criteria options are:
- Stock Availability: prioritize parts based on stock availability.
- Lead Time: select based on shorter lead times.
- Minimum Price: select the lowest priced options.
- Authorised Suppliers: restrict selection to authorized suppliers only.
- Supplier Selection: Use the dropdown to specific supplier preferences.
Step 6: Select Data Preference
- Click on Data Preference and select the required preference (Mandatory).
a tab will open with the heading Data Preference and sub-heading Choose sourcing data sources
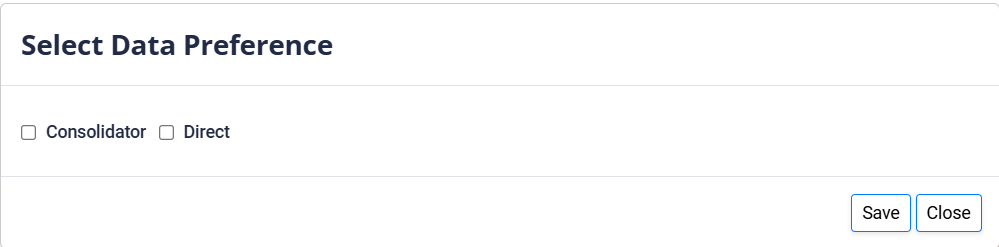
The available data preference options are:
- Consolidator: Prioritize sourcing from third-party distributors or aggregators who supply parts from multiple manufacturers. This is often useful for simplifying logistics or when buying in smaller quantities.
- Direct: Prioritize sourcing directly from the original component manufacturers (OCMs). This ensures the highest level of improved traceability.
Step 7: Upload
- Once all validations are complete and mandatory fields are selected, the Upload button will be enabled. Click it to finalize the process.
After uploading the upload status will show completed in the engineer dashboard.

2. Get Released List
This option allows you to pull the sourcing list directly from the ERP system without manually uploading a file.
- In the upload interface, click on Get Released List.
- The system will automatically retrieve the latest released list from the ERP.
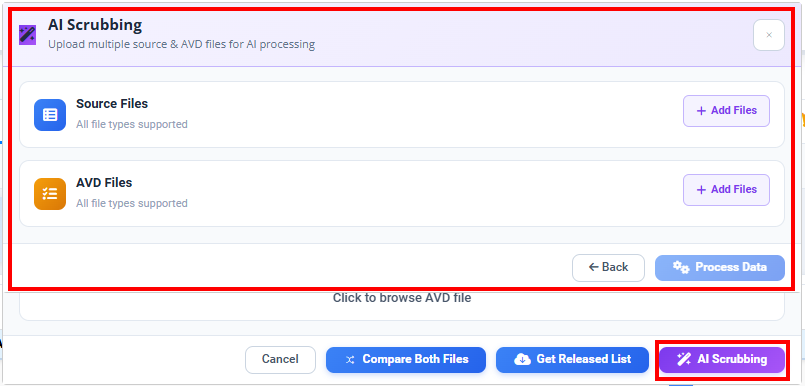
3. AI Scrubbing
This option allows you to upload files in various formats and let the system parse and clean the data automatically.
- In the upload interface, click on AI Scrubbing.
- Upload your file (the system accepts various file formats). The selected file will be shown below the upload area.
- Click Process Data File to begin scrubbing.
- Once the process is complete, a green notification will appear in the top-right corner of the screen confirming success.
Clicking anywhere on the Project will take you to a different screen (Source Board) displaying all the information about the project.
Engineer Review
Review of online information and purchase history to ensure data accuracy.